Storefront
Ember & Oak
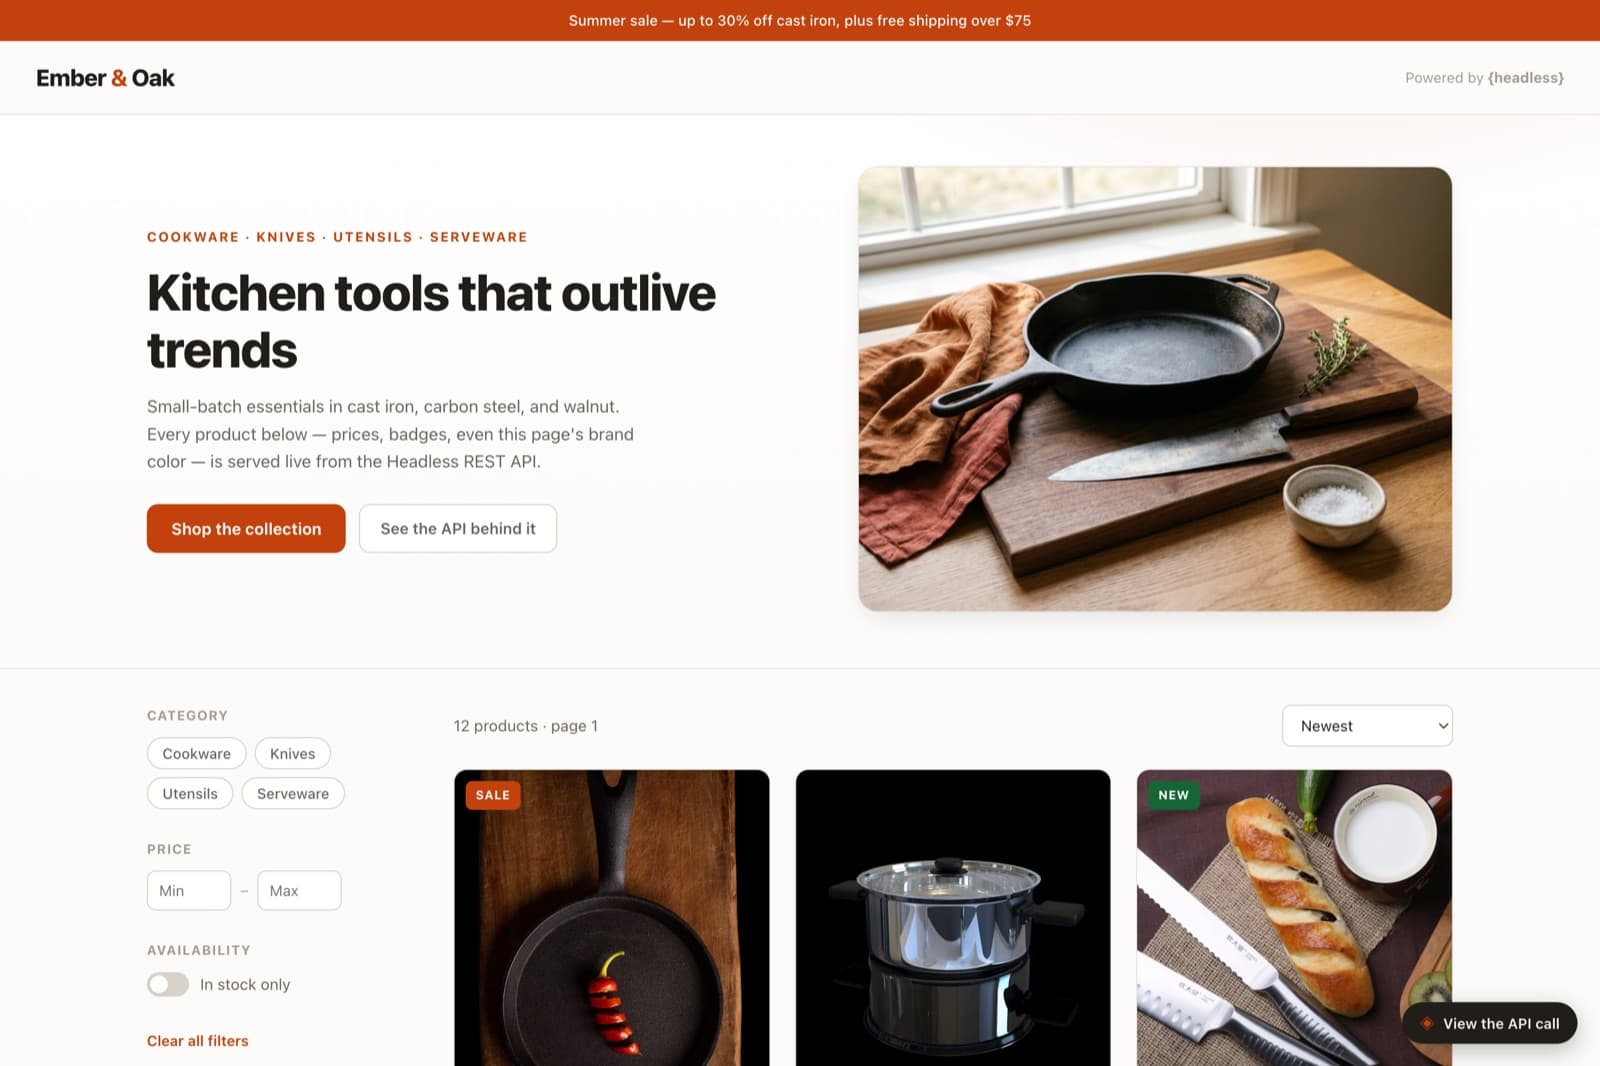
Ember & Oak is a demo, not a real shop — it’s here to show one kind of thing you could build on Headless. The idea: a storefront where the product grid does no client-side filtering, because every category chip, price range, in-stock toggle, sort order, and page turn is a query the server answers — and a single “Store Settings” entry drives the brand color, name, hero headline, and announcement bar, so changing it re-skins the whole site. Here’s how you’d build your own like it, by prompting a coding agent.
Step 0
The content model
Here’s the shape you’re aiming for. You don’t have to build it by hand — the next steps have an agent create it for you — but it helps to see the target first. Expand a type to see its fields.
storesettingsSingleton5 fields
One-of-a-kind settings that theme the whole storefront at runtime.
- brandcolorTexthex, sets the accent
- storenameText
- taglineTextrendered as the hero headline
- announcementTexttop bar; hidden if empty
- freeshippingthresholdNumber
productCollection10 fields
The catalog — queried with filters, sort, and pagination.
- nameText
- descriptionText
- priceNumber
- compareatpriceNumberstrikethrough price
- imageurlText
- categoryEnumcookware · knives · utensils · serveware
- badgeEnumsale · new · limited
- instockBoolean
- ratingNumber
- materialsMulti-selectstainless-steel, walnut, cast-iron, …
The recipe
Build your own with an agent
Use this as a blueprint, not a script — adapt the fields and copy to whatever you’re making. Each step is a real prompt you can hand to a coding agent like Claude Code with the Headless MCP server connected; the terminals show the tool calls the agent makes, and the code is what it produces.
Create the project
Start by asking your agent to create a project. With the Headless MCP server connected, it can do this directly — no dashboard round-trip. Every project ships with REST, GraphQL, and MCP the moment it exists.
MCP · Headless# Spin up a fresh project› claude "Create a Headless project called Ember & Oak for a kitchenware store"✓ create_project { name: "Ember & Oak", slug: "demo-shop" }→ demo-shop ready · REST · GraphQL · MCP liveModel the content
Describe the data in plain language and let the agent translate it into content types and fields. Ember & Oak needs two: a one-off “Store Settings” singleton that themes the site, and a “Product” collection for the catalog. New fields are queryable the same second they exist — no migration, no deploy.
MCP · Headless# A singleton for store-wide settings› claude "Add a singleton Store Settings with brand color, store name, tagline, announcement, and a free-shipping threshold"✓ create_content_type { name: "Store Settings", isSingle: true }✓ create_field × 5# Then the product catalog› claude "Add a Product type: name, description, price, compare-at price, image URL, a category enum, a badge enum, in-stock, rating, and a materials multi-select"✓ create_content_type { name: "Product" }✓ create_field × 10 (category & materials as enums)→ 2 types, 15 fields — live over the APISeed some content
Have the agent fill the store: set the singleton’s brand color and copy, then batch-create a realistic spread of products across every category so the filters have something to bite on. `create_entries` takes up to 100 at a time.
MCP · Headless# Fill the shelves› claude "Set the store settings, then seed a dozen products across cookware, knives, utensils, and serveware — then publish them"✓ update_entry storesettings { brandcolor: "#c2410c", … }✓ create_entries product × 12✓ publish_entries { count: 12 }→ the storefront has content to renderMint a read-only API key
The storefront reads content in the browser, so it needs a public, read-only key — never a write key. Create one in the dashboard under Project Settings → API Keys with Read scope, then smoke-test it from the terminal before wiring up any UI.
Terminal# Confirm the key works and see the response shape curl -s "https://headless.build/api/v1/demo-shop/product?limit=1" \ -H "X-API-Key: hls_live_your_read_only_key" | jq # → { "data": [ { "id": "...", "attributes": { "name": ... } } ], # "meta": { "total": 12 } }Build the storefront
Now hand the whole frontend to the agent as one task. The key move: filtering, sorting, and pagination are not done in JavaScript — they’re encoded in the query string and answered by the server. Filters use the plural `filters[field][$op]` syntax; sort uses a leading `-` for descending.
Claude Code# The storefront itself› claude "Write a single self-contained index.html storefront: read Store Settings to theme the page, then list Products with a category filter, price range, in-stock toggle, sort, and pagination — all server-side via the REST API"✓ Write public/demos/demo-shop/index.html→ 1 file · vanilla JS · no build stepindex.html// The server does the work — the client just builds the query string. function buildQuery() { const p = new URLSearchParams(); p.set("limit", 6); p.set("page", page + 1); // 1-indexed p.set("sort", state.sort); // "-createdAt" | "price" | "-price" | "-rating" if (state.category) p.set("filters[category][$eq]", state.category); if (state.min) p.set("filters[price][$gte]", state.min); if (state.max) p.set("filters[price][$lte]", state.max); if (state.inStock) p.set("filters[instock][$eq]", "true"); return `/product?${p}`; } async function api(path) { const res = await fetch(`https://headless.build/api/v1/demo-shop${path}`, { headers: { "X-API-Key": API_KEY }, }); return res.json(); // { data: [...], meta: { total } } }Ship it
At this point your storefront is just static files plus a CMS — deploy the frontend to any static host and you’re live. Because the catalog and the theme both live in Headless, the site keeps itself current: publish a new product or change the brand color and it shows up on the next load, no redeploy. The Ember & Oak demo you can open above is exactly this, running on our own API — proof the pattern works end to end.